How to Make a Great Recirculating Stream Table on the Cheap ($60)
Updated 3/23/2023
|
|
|
The Backstory...
I tend to get frustrated when science supply companies charge educators obscene prices for what turns out to be simplistic and often flimsy equipment. When I was a new teacher in need of stream tables for my fledgling geoscience classes, I had my school pony-up $100 a pop for what I thought were going to be awesome stream tables (I mean, for $100 they must be awesome, right??) They turned out to be nothing more than long plastic troughs that were designed to have buckets poured over them while draining to the grass! Not exactly what I had envisioned. Necessity led me to modify those first tables by adding pumps, sumps and tubing.
I've since perfected my DIY Stream tables so that they have the ability to be stored in a fairly small space when not in use. The addition of 3D-printed threaded nuts allows for easy removal of the drain pipe allowing the tubs to nest within one another which makes for great storage! The sand sits atop garden weed-barrier cloth in the stream table which prevents the sand from clogging drains and pumps. The cloth also prevents the sand from slumping on the low-friction plastic bottom. The sand can be easily removed for drying and storing by picking using the weed cloth and allowing it to air dry for a day or two.
As you can see from the videos and pics on this page, the end result works quite well. They also drain much better with the modified 5/8" tubing and drain.
Fluvial geomorphology made easy! An entire class set of six would cost less than $360!! Instructions & parts follow.
Parts
Hunt around for the best deals. The prices I list are for brand new parts. If you're like me you may already have most of the stuff lying around the garage which would then make this project REALLY cheap! I ordered the tubing and pump from Amazon Prime. I got the Sterlite box at Walmart/ Target and everything else at local hardware stores. I would recommend making four or more tables at once so you can buy in bulk and shave-off a few more bucks.
Putting it Together
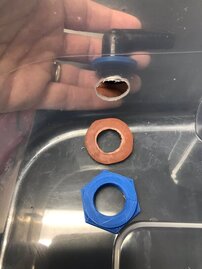
Stream Table Modified with removable 5/8" Garden Irrigation Elbow. Follow most of the constructions of the original. Note, the hole is now drilled and leaves enough space for the hexnut to be spun and tightened, but is still low enough to allow for good drainage.